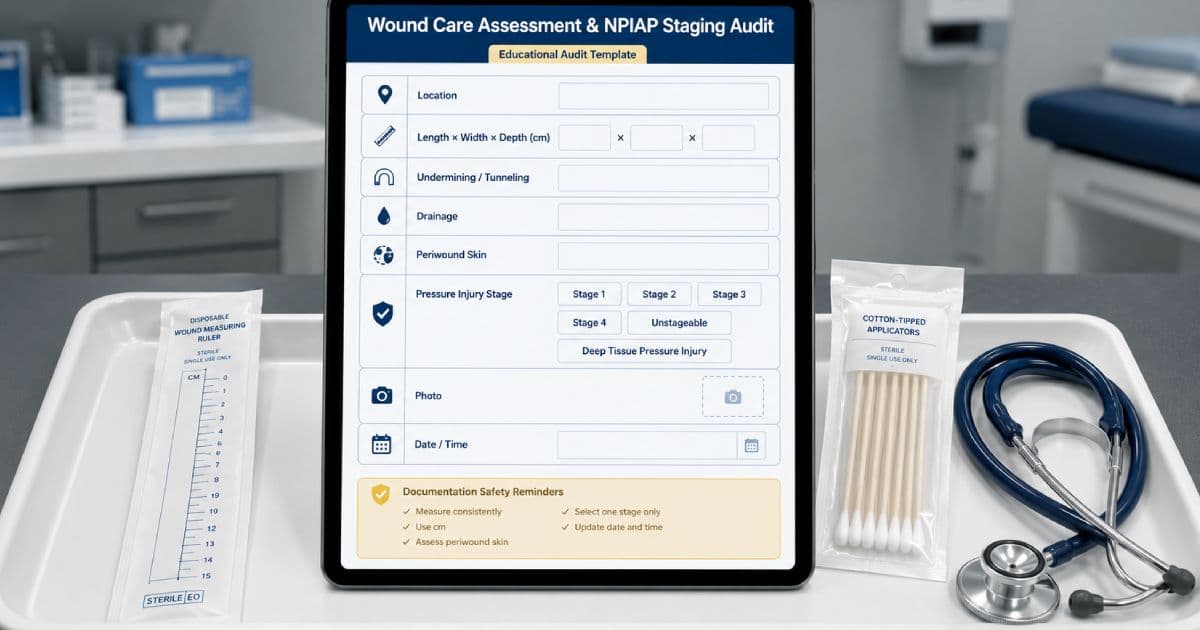
A wound assessment is more than naming a stage or measuring an opening in the skin.
The nurse must identify the wound's likely cause, establish a reproducible baseline, describe what is visible and palpable, recognize deterioration, evaluate the patient's response, and communicate findings clearly enough that the next clinician can detect change.
Inconsistent language creates risk. A note that says only “wound looks good” does not tell the team:
- Where the wound is located
- Whether it is pressure related
- What tissue is visible
- How large or deep it is
- Whether drainage changed
- Whether the surrounding skin is deteriorating
- What treatment was performed
- Whether the patient tolerated care
Precise documentation is also essential when determining whether a pressure injury was present on admission, acquired during care, improving, or worsening. It supports treatment decisions, quality review, reimbursement, and continuity across shifts.
The medical record may later be examined during an audit, regulatory review, insurance claim, investigation, or legal proceeding. Chart what you observed, measured, did, communicated, and reassessed. Do not copy forward an earlier wound description or record a conclusion that the assessment cannot support.
This wound assessment for nurses guide covers:
- A repeatable bedside assessment sequence
- Current NPIAP pressure injury staging terminology
- Stage 1 through Stage 4 pressure injuries
- Unstageable pressure injuries and deep tissue pressure injuries
- Medical device-related and mucosal membrane pressure injuries
- Wound-bed tissue and edge assessment
- Wound drainage types
- Length, width, depth, tunneling, and undermining
- The wound measurement clock method
- Objective nursing wound charting examples
- Findings that require urgent escalation
The Core Wound Assessment Sequence
A systematic sequence reduces missed findings and makes repeated assessments easier to compare.
Before removing the dressing, review:
- The wound diagnosis or suspected cause
- Previous measurements and photographs
- Current wound-care orders
- Dressing product and change frequency
- Allergies and adhesive sensitivities
- Analgesia plan
- Mobility and pressure-injury risk
- Diabetes, vascular disease, neuropathy, immunosuppression, and nutrition concerns
- Recent fever, leukocytosis, antibiotic therapy, or culture results
Then assess in this order:
- Verify and prepare. Identify the patient, explain the procedure, provide privacy, perform hand hygiene, gather supplies, and use the required precautions.
- Assess pain. Determine baseline pain and whether premedication or a pause is needed. Reassess pain after care.
- Inspect the old dressing. Note whether it is intact, loose, leaking, saturated, displaced, or malodorous. Observe the drainage before discarding it.
- Remove the dressing safely. Follow clean or sterile technique as ordered. Avoid pulling fragile skin.
- Identify wound type and location. Use precise anatomical language and laterality. Do not assume every wound over a bony area is a pressure injury.
- Assess the wound bed. Describe visible tissue types and estimate percentages when required.
- Assess wound edges. Note whether edges are attached, open, rolled, macerated, irregular, or separated.
- Assess the periwound. Look and palpate for color change, warmth or coolness, edema, induration, maceration, tenderness, fluctuance, and skin breakdown.
- Measure consistently. Record length, width, depth, and any tunneling or undermining in centimeters using the facility's approved method.
- Assess exudate and odor. Document type, amount, color, consistency, and odor after cleansing when policy requires.
- Perform ordered care. Cleanse, apply products, fill dead space, and cover the wound exactly as ordered and within scope.
- Reposition or offload. Implement the pressure-redistribution plan when applicable.
- Document and communicate. Record objective findings, treatment, tolerance, education, notifications, and the resulting plan.
Pressure Injury Staging: The Rule That Comes First
The National Pressure Injury Advisory Panel staging system describes the extent of pressure-related tissue damage.
Do not use Stage 1 through Stage 4 labels for:
- Surgical incisions
- Skin tears
- Abrasions
- Burns
- Venous leg ulcers
- Arterial ulcers
- Diabetic or neuropathic foot ulcers
- Incontinence-associated dermatitis
- Intertriginous dermatitis
- Medical adhesive-related skin injury
- Dermatologic disease
The first question is not “What stage is this?”
It is:
“Is there evidence that pressure, or pressure combined with shear, caused this injury?”
If the etiology is uncertain, describe the findings objectively and escalate for diagnostic clarification. A stage does not establish the cause by itself.
Present on Admission and Hospital-Acquired Pressure Injuries
Document the baseline skin assessment as early as the care setting requires. Include existing wounds, scars, discoloration, devices, pressure points, and prevention measures.
Do not label a pressure injury “hospital acquired” solely because it became visible after admission. Deep tissue damage can evolve over time, and quality-reporting definitions include specific clinical and timing criteria. Follow the organization's present-on-admission, event-review, and reporting process. Accurate documentation helps the review team establish what was present, when change was first detected, and which preventive actions were implemented.
Pressure Injury Staging at a Glance
| Classification | Skin and tissue findings | Structures visible or palpable | Common staging trap |
|---|---|---|---|
| Stage 1 | Intact skin with localized, persistent non-blanchable color change | None exposed | Relying only on redness in darker skin tones |
| Stage 2 | Partial-thickness skin loss with exposed dermis; viable pink/red moist bed or serum-filled blister | No adipose or deeper structures | Calling moisture damage, a skin tear, or a wound with slough “Stage 2” |
| Stage 3 | Full-thickness skin loss; adipose may be visible | No exposed fascia, muscle, tendon, ligament, cartilage, or bone | Choosing the stage from wound depth in centimeters |
| Stage 4 | Full-thickness skin and tissue loss | Exposed or directly palpable fascia, muscle, tendon, ligament, cartilage, or bone | Assuming bone must be visibly protruding |
| Unstageable | Full-thickness loss is present, but slough or eschar obscures the extent | Cannot determine deepest involved structure | Guessing Stage 3 or Stage 4 before the base is visible |
| Deep tissue pressure injury | Persistent deep red, maroon, or purple discoloration; intact or non-intact skin; may have epidermal separation or a blood-filled blister | Deep damage may be evolving beneath the surface | Calling a purple/maroon blister Stage 2 |
Stage 1 Pressure Injury: Non-Blanchable Erythema of Intact Skin
A Stage 1 pressure injury has intact skin with a localized area of persistent non-blanchable erythema or color change.
The area may also differ from nearby tissue in:
- Temperature
- Firmness or softness
- Sensation
- Pain or tenderness
How to Check Blanching
When appropriate for the patient and tissue:
- Use adequate lighting.
- Compare the area with adjacent and symmetrical skin.
- Press a finger or transparent disk over the discoloration for about three seconds.
- Release and observe whether the color temporarily lightens.
If the erythema does not blanch, pressure injury should be considered in the context of location, pressure exposure, shear, and the complete assessment.
Stage 1 in Darker Skin Tones
Visible redness may be subtle or absent in medium to dark skin.
Do not rely on color alone. Look for:
- A localized area darker or lighter than the surrounding skin
- Change in hue
- Warmth or coolness
- Edema
- Induration or altered firmness
- Localized pain
- A difference compared with the same site on the opposite side
The 2026 International Pressure Injury Guideline recommends combining visual and tactile assessment and comparing the finding with the individual's baseline skin tone.
Purple or maroon discoloration is not classified as Stage 1. It may indicate a deep tissue pressure injury.
Stage 2 Pressure Injury: Partial-Thickness Skin Loss With Exposed Dermis
A Stage 2 pressure injury has partial-thickness skin loss and exposed dermis.
Expected features include:
- A viable pink or red wound bed
- A moist, shallow appearance
- An intact or ruptured serum-filled blister
The following are not present in a Stage 2 pressure injury:
- Visible adipose tissue
- Granulation tissue
- Slough
- Eschar
- Exposed deeper structures
If granulation, slough, eschar, or adipose is visible, reassess the wound classification. The finding is not consistent with Stage 2.
Conditions Commonly Misclassified as Stage 2
- Incontinence-associated dermatitis
- Moisture-associated skin damage
- Skin tears
- Tape or adhesive injury
- Friction injuries
- Burns
- Abrasions
- Ruptured bullae from non-pressure causes
These conditions require an etiology-specific assessment and care plan.
Stage 3 Pressure Injury: Full-Thickness Skin Loss
A Stage 3 pressure injury has full-thickness skin loss.
Adipose tissue may be visible. Other possible findings include:
- Granulation tissue
- Epibole, or rolled wound edges
- Slough or eschar that does not obscure the full depth
- Undermining
- Tunneling
The following structures are not exposed in Stage 3:
- Fascia
- Muscle
- Tendon
- Ligament
- Cartilage
- Bone
Depth Does Not Determine the Stage
A deep wound is not automatically Stage 4.
Anatomical location affects visible depth:
- The bridge of the nose, ear, occiput, and malleolus have little subcutaneous tissue, so a Stage 3 injury may be shallow.
- Areas with more adipose tissue can develop very deep Stage 3 wounds.
Stage by the tissue involved—not by the number of centimeters.
If slough or eschar prevents confirmation of the full extent of tissue loss, classify the pressure injury as unstageable rather than guessing Stage 3.
Stage 4 Pressure Injury: Full-Thickness Skin and Tissue Loss
A Stage 4 pressure injury has full-thickness skin and tissue loss with at least one of the following exposed or directly palpable in the ulcer:
- Fascia
- Muscle
- Tendon
- Ligament
- Cartilage
- Bone
Slough or eschar may be visible. Epibole, tunneling, and undermining often occur.
“Directly palpable” matters. A deep structure does not need to project visibly from the wound to meet the definition.
Stage 4 injuries can carry substantial risk of complications, including deep infection and osteomyelitis. Escalate according to policy and ensure wound-care, medical, nutritional, pressure-redistribution, and other indicated plans are coordinated.
Unstageable Pressure Injury: Obscured Full-Thickness Loss
An unstageable pressure injury has full-thickness skin and tissue loss, but the true extent cannot be confirmed because slough or eschar obscures the wound bed.
The correct documentation is unstageable, not “probably Stage 3” or “likely Stage 4.”
If enough nonviable tissue is removed to reveal the base, the pressure injury will be classified as Stage 3 or Stage 4 based on the deepest tissue involved.
The Stable Eschar Exception
Stable eschar is:
- Dry
- Adherent
- Intact
- Without surrounding erythema
- Without fluctuance
NPIAP guidance states that stable eschar on a heel or ischemic limb should not be softened or removed.
This is not permission to ignore the site. Protect and offload it, assess perfusion and surrounding tissue, and promptly report:
- Drainage
- Lifting or separation
- Boggy tissue
- Fluctuance
- New erythema or color change
- Warmth
- Odor
- Pain
- Systemic deterioration
Do not initiate debridement without the appropriate order, vascular assessment when indicated, and clinician authorization.
Deep Tissue Pressure Injury
A deep tissue pressure injury, or DTPI, can present as:
- Persistent non-blanchable deep red, maroon, or purple discoloration
- Intact or non-intact skin
- Epidermal separation over a dark wound bed
- A blood-filled blister
Pain and temperature change may occur before a visible color change.
The surface can underestimate the injury beneath it. A DTPI may:
- Evolve rapidly and reveal deeper tissue loss
- Remain stable for a period
- Resolve without open tissue loss
If adipose, granulation tissue, necrotic tissue, fascia, muscle, or another underlying structure is visible, the injury is no longer described as DTPI. Reclassify it according to the visible tissue and staging criteria.
Do not use DTPI for vascular, traumatic, neuropathic, or dermatologic injuries.
Medical Device-Related and Mucosal Membrane Pressure Injuries
A medical device-related pressure injury is caused by a device used for diagnostic or therapeutic purposes.
Examples include injury beneath or around:
- Oxygen tubing
- Masks
- Cervical collars
- Splints or casts
- Tubing and securement devices
- Compression devices
- Pulse oximeter probes
The wound often conforms to the shape or pattern of the device. If the injury involves skin, use the pressure injury staging system.
A mucosal membrane pressure injury occurs on a mucous membrane where a medical device was used. Because mucosal anatomy is different from skin, it is not assigned a Stage 1 through Stage 4 classification.
Document:
- Exact site
- Device involved
- Tissue appearance
- Pain
- Drainage or bleeding
- Device assessment and repositioning when permitted
- Notification and treatment plan
Wound-Bed Tissue Types
The wound bed should be described by what is actually visible after cleansing, when cleansing is part of the ordered procedure.
When estimating percentages, the total should equal 100%.
Granulation Tissue
Healthy granulation tissue is typically:
- Red or pink
- Moist
- Granular or bumpy
- Composed of new capillaries and connective tissue
It may bleed easily with trauma.
Do not assume every red area is healthy granulation. Dusky, pale, friable, hypergranulated, or easily bleeding tissue may require further assessment.
Slough
Slough is nonviable tissue that may appear:
- Yellow
- Tan
- Gray
- White
- Soft
- Stringy
- Moist
- Loosely or firmly attached
Slough is not pus. They can look similar, but slough is tissue attached to the wound bed, while purulent exudate is drainage.
Eschar
Eschar is devitalized tissue that is commonly:
- Tan, brown, or black
- Dry or moist
- Soft or firm
- Adherent to the wound bed
Document its color, consistency, adherence, and percentage of the wound bed.
Epithelial Tissue
Epithelialization appears as new, delicate pink or pearly tissue migrating across the wound surface.
In a full-thickness wound, epithelial tissue advances from the edges. It is fragile and should not be confused with macerated white tissue.
Hypergranulation
Hypergranulation is granulation tissue that rises above the wound edges.
It can interfere with epithelial migration and may be associated with excess moisture, friction, inflammation, bacterial burden, or other factors. Describe it objectively and refer it for evaluation rather than labeling it “good granulation.”
Assessing Wound Edges
Wound edges provide important clues about healing and moisture balance.
Document whether the edges are:
- Attached: Flush with the wound base
- Unattached: A space exists under the edge
- Well-defined or indistinct
- Open or approximated
- Rolled: Epibole is present
- Macerated: White, pale, soft, or waterlogged
- Callused or hyperkeratotic
- Erythematous
- Necrotic
- Separated or dehisced
For an incision, describe the entire line rather than documenting only the most abnormal point. Note staples, sutures, adhesive, drains, or other closure materials when present.
Assessing the Periwound
The periwound is the skin surrounding the wound.
Some standardized tools evaluate a defined area, such as within 4 cm of the edge. Follow the selected tool and document the actual extent of abnormal findings.
Assess for:
- Erythema or change from baseline skin tone
- Warmth or coolness
- Maceration
- Dryness or scaling
- Edema
- Induration
- Tenderness
- Fluctuance
- Crepitus
- Rash
- Denudement
- Blistering
- Adhesive injury
- Satellite lesions
Avoid vague phrases such as “redness around wound.” A stronger note states:
“Periwound with non-blanchable darkening and warmth extending 1.5 cm from the inferior edge.”
Wound Drainage Types
Exudate is fluid produced in the wound environment. Its appearance, amount, odor, and change over time matter.
| Drainage type | Typical appearance | Nursing interpretation |
|---|---|---|
| Serous | Clear to pale yellow; thin and watery | Can occur during healing; increasing volume still requires evaluation |
| Sanguineous | Red and bloody | May occur early after surgery or trauma; new, persistent, or increasing bleeding is concerning |
| Serosanguineous | Pink to light red; thin and watery | Common in many healing wounds and early postoperative drainage |
| Purulent | Opaque; creamy or thick; yellow, tan, green, brown, or other abnormal color | Raises concern for infection and requires assessment and escalation |
Purulent Drainage Does Not Stand Alone
Purulent drainage is concerning, but wound infection is a clinical diagnosis based on the whole picture.
Assess for:
- New or increasing pain
- Spreading erythema or color change
- Warmth
- Edema or induration
- Delayed healing
- Friable tissue
- Wound breakdown
- Increasing exudate
- Malodor after cleansing
- Fever or other systemic signs
- Tachycardia, hypotension, altered mental status, or other deterioration
Some infected wounds produce little or no purulence, especially in immunocompromised patients. Conversely, color and odor may be affected by dressing products, organisms, medications, or devitalized tissue.
Do not diagnose infection from odor alone.
Documenting Drainage Amount
Common terms include:
- None
- Scant
- Small or light
- Moderate
- Large, heavy, or copious
Some tools define amount by the percentage of the dressing affected:
- Small: Less than 25%
- Moderate: More than 25% but less than 75%
- Large: More than 75%
These thresholds are not universal. Dressing size, absorptive capacity, wear time, wound location, leakage, and recent cleansing can change the observation.
Use the organization's approved scale and add objective detail when helpful:
“Moderate serous drainage; approximately 40% of foam dressing affected after 24 hours; no strike-through or leakage.”
For a drain, negative-pressure canister, or collection device, document measurable output in milliliters according to policy.
Assessing Odor
If the dressing itself is malodorous, reassess after removal and wound cleansing when ordered. Document odor using the facility's scale, such as none, mild, moderate, or strong.
Avoid unsupported conclusions:
- Weak: “Wound infected and smells terrible.”
- Stronger: “Strong malodor persists after cleansing; moderate opaque tan drainage present; periwound warm and indurated 2 cm from wound edge; temperature 38.3°C. Provider and wound-care nurse notified.”
How to Measure a Wound
Use a disposable metric ruler and record dimensions in centimeters.
The two commonly used surface-measurement conventions are:
- Clock method: Length is measured head to toe, from 12:00 to 6:00. Width is measured perpendicular to length, from 9:00 to 3:00.
- Greatest-length method: Measure the longest dimension, then the widest dimension perpendicular to it.
Both methods appear in clinical documentation systems. Use the method required by the facility and keep it consistent over time.
Length
For the clock method, measure from 12:00 toward 6:00.
For the greatest-length method, measure the longest surface dimension. State which method was used if the EHR does not make it clear.
Width
Measure the widest point perpendicular to the recorded length.
Do not rotate the ruler independently to find both the greatest possible length and greatest possible width if the selected method requires width to remain perpendicular.
Depth
Depth is measured at the deepest point of the wound bed.
When ordered, appropriate, and within competency:
- Use the required clean or sterile single-use applicator.
- Insert it gently into the deepest visible area.
- Keep the applicator perpendicular to the wound surface unless the assessment tool instructs otherwise.
- Mark the level of the wound edge.
- Measure the applicator against a metric ruler.
Never force an applicator into tissue or blindly probe an area that should not be explored. Stop if there is resistance, unexpected pain, bleeding, concern for exposed structures, or uncertainty.
Stage 1 injuries have intact skin and therefore no open-wound depth. Stage 2 injuries are partial thickness; if a seemingly shallow wound has measurable deep tissue loss, reassess the classification.
A Note About Wound Area
Length multiplied by width provides a simple rectangular estimate, not the true area of an irregular wound.
It can still help track progress if:
- The same method is used each time
- The patient is positioned consistently
- The same anatomical orientation is maintained
- The wound is not compared using a different measurement technique
Clinical photography or digital planimetry may improve trend assessment when available, but photography must follow consent, privacy, device, and records policies. Never use a personal phone unless the organization expressly authorizes a secure clinical workflow.
Tunneling vs. Undermining
Tunneling and undermining are both areas of tissue loss beyond the visible wound bed, but their shapes differ.
| Finding | Shape | Origin | Documentation example |
|---|---|---|---|
| Undermining | Broad, shelf-like space beneath an intact wound edge | Extends under part of the wound perimeter | “Undermining from 1:00 to 4:00; deepest point 2.0 cm at 3:00” |
| Tunneling | Narrow channel or tract | Extends from the wound bed into surrounding tissue | “Tunnel at 2:00 measuring 3.1 cm” |
Measuring Undermining
If assessment is ordered and within competency:
- Establish 12:00 toward the head and 6:00 toward the feet.
- Gently place the applicator beneath the wound edge.
- Advance without force.
- Identify the clock range involved.
- Measure the deepest point in centimeters.
- Document both the range and maximum depth.
Example:
“Undermining from 7:00 to 10:00, deepest at 9:00 measuring 1.2 cm.”
Measuring a Tunnel
Gently direct the applicator into the tract only as allowed by policy and the care plan.
Document:
- Clock position
- Depth in centimeters
- Drainage if present
- Whether the tract's endpoint was reached without force
Do not describe a tunnel merely as “deep.” Record the measured length.
What Else Belongs in a Complete Wound Assessment?
Dimensions and tissue are only part of the clinical picture.
Etiology and Location
Document:
- Specific anatomical location
- Laterality
- Pressure, surgical, traumatic, vascular, neuropathic, moisture-related, or other known etiology
- Whether the wound was present on admission or first identified during care, according to policy
Pain
Record:
- Pain score using the appropriate scale
- Location and quality
- Pain at rest and during care
- Intervention
- Response
Unexpectedly increasing pain can precede obvious deterioration.
Wound Edges and Closure
For incisions, document:
- Approximated or separated edges
- Length of any separation
- Closure material
- Drain or device
- Bleeding or drainage
- Surrounding findings
Patient and System Factors
Report factors that can affect healing or pressure risk:
- Immobility
- Reduced sensation
- Poor perfusion
- Diabetes
- Malnutrition risk
- Incontinence or excess moisture
- Edema
- Smoking
- Immunosuppression
- Repeated friction or shear
- Inability to adhere to offloading
- Device pressure
Do not chart a causal conclusion unless supported. For example, “wound caused by noncompliance” is judgmental and medically incomplete.
Nursing Wound Charting Checklist
A complete note should allow another clinician to picture the wound without seeing it.
Include:
- Date and time
- Wound identifier
- Exact location and laterality
- Etiology or diagnosis, if established
- Pressure injury stage, if applicable
- Length × width × depth in centimeters
- Measurement method
- Tunneling and undermining
- Wound-bed tissue and percentages
- Wound edges
- Drainage type and amount
- Odor, including whether assessed after cleansing
- Periwound findings and measured extent
- Pain before, during, and after care
- Cleansing and products applied
- Dressing status and securement
- Offloading or repositioning
- Patient education
- Patient tolerance
- Photographs obtained per policy
- Provider or wound-care notification
- New orders and follow-up plan
Charting Example 1: Healing Surgical Incision
07/29/2026 0900: Lower midline abdominal incision assessed during ordered dressing change. Incision length 12.0 cm; edges well approximated with 14 staples intact. No separation, active bleeding, warmth, induration, or periwound color change from baseline. Scant thin pink serosanguineous drainage on old dressing; no leakage and no odor after cleansing. Site cleansed and dry sterile dressing applied per order. Patient reports incisional pain 2/10 before care and 2/10 after care; tolerated procedure without distress.
Why this works:
- Identifies exact location
- Describes closure and approximation
- Quantifies the length
- Characterizes drainage
- Avoids calling the incision a pressure injury
- Documents ordered care and patient response
Charting Example 2: Stage 3 Sacral Pressure Injury
07/29/2026 1030: Established Stage 3 pressure injury over sacrum reassessed with patient in left side-lying position. Clock method used. Wound measures 4.5 cm L × 3.2 cm W × 1.5 cm D. Wound bed 70% red granulation tissue and 30% adherent yellow slough; no exposed or directly palpable fascia, muscle, tendon, cartilage, or bone. Moderate thin pink serosanguineous exudate affecting approximately 40% of old foam dressing after 24 hours; no strike-through and no odor after cleansing. Tunnel at 1:00 measures 2.1 cm. Undermining from 7:00 to 10:00, deepest at 9:00 measuring 1.2 cm. Edges open with mild epibole from 4:00 to 6:00. Periwound with maceration extending 0.8 cm along inferior edge and blanchable erythema extending 1.0 cm from lateral edge; no fluctuance or crepitus. Pain 3/10 during cleansing. Wound cleansed and ordered hydrofiber ribbon placed loosely into dead space with retrieval tail visible; bordered foam applied per order. Patient repositioned with sacrum offloaded. Wound-care nurse notified of maceration and epibole; review planned today.
This example separates:
- Stage
- Measurements
- Tissue percentages
- Drainage
- Tunnel
- Undermining
- Edges
- Periwound
- Treatment
- Escalation
It does not state that slough was debrided unless debridement was actually ordered and performed by an authorized clinician.
Charting Example 3: Suspected Stage 1 Pressure Injury in Darker Skin
07/29/2026 1415: Intact skin over right heel with localized non-blanchable darkening compared with left heel and surrounding baseline skin tone. Area measures 2.0 × 1.8 cm. Skin warmer and firmer than contralateral heel; patient reports tenderness 4/10 with light palpation. No purple/maroon discoloration, blister, drainage, or open skin. Findings consistent with suspected Stage 1 pressure injury. Heel offloaded using ordered device; charge nurse and wound-care nurse notified. Pressure-injury prevention plan reviewed and updated per protocol.
This note does not rely on the word “red.”
Charting Example 4: Incision With Findings Requiring Escalation
07/29/2026 1830: Right hip incision with new 1.2 cm separation at distal edge. Moderate opaque tan drainage on dressing and strong odor persists after cleansing. Periwound warmth, induration, and color change extend 2.5 cm from distal edge. Patient reports pain 7/10, increased from 3/10 this morning. Temperature 38.4°C, heart rate 108/min, blood pressure 112/66 mm Hg. Surgical provider and charge nurse notified at 1840; new orders received and implemented. Patient remains under reassessment.
The note reports objective findings and notification. It does not diagnose an infection unless a qualified clinician has made and documented that diagnosis.
Common Wound-Assessment and Charting Mistakes
Mistake 1: Staging Every Open Wound
Only pressure injuries use the NPIAP staging system.
Document a venous ulcer, diabetic foot ulcer, skin tear, incision, or moisture injury using the appropriate classification and etiology-specific assessment.
Mistake 2: Calling a Wound Stage 2 When Slough Is Present
Stage 2 wounds do not contain slough, eschar, or granulation tissue.
Reassess the diagnosis and obtain wound-care support.
Mistake 3: Guessing Through Eschar
If slough or eschar obscures full-thickness tissue loss, the pressure injury is unstageable.
Do not assign Stage 3 or Stage 4 until the tissue is sufficiently visible, unless another authorized diagnostic process provides the necessary determination under policy.
Mistake 4: Measuring Differently Each Time
Changing patient position, ruler orientation, technique, or documentation method can create an apparent change that is not real.
Use the same:
- Position
- Anatomical orientation
- Measurement method
- Units
- Wound identifier
Mistake 5: Charting Only the Dressing Change
“Dressing changed per order” does not document the wound's status.
Include the assessment elements required for that encounter and note any comparison with baseline.
Mistake 6: Treating Odor as Proof of Infection
Odor is one data point. Assess it after cleansing when appropriate and interpret it with tissue, drainage, pain, periwound findings, healing trajectory, and systemic status.
Mistake 7: Copying Forward Yesterday's Description
Copied measurements and tissue percentages can conceal deterioration and create inaccurate records.
Document what you assessed today. If an element was not assessed because the dressing was not due to be removed, say so and document the visible dressing and surrounding findings.
Mistake 8: Using a Personal Phone for Wound Photos
Clinical images are part of the health record and may contain protected health information.
Use only an approved device, application, consent process, and storage workflow.
Red Flags That Require Prompt Escalation
Follow facility policy and the patient's clinical situation. Urgent findings can include:
- Active bleeding that does not stop with permitted initial measures
- Rapidly increasing sanguineous drainage
- New wound dehiscence or evisceration
- Newly exposed or palpable deep structure
- Rapidly spreading erythema or color change
- Increasing warmth, edema, or induration
- Fluctuance or crepitus
- New purulent drainage
- Strong odor persisting after cleansing
- Sudden increase in pain
- New skin necrosis
- A rapidly evolving DTPI
- New Stage 3, Stage 4, unstageable, or DTPI findings
- Signs of ischemia, such as cool tissue, pallor, cyanosis, absent pulses, or severe rest pain
- Fever or other systemic signs
- Hypotension, tachycardia, altered mental status, or concern for sepsis
For abdominal wound evisceration or another immediate surgical emergency, remain with the patient, activate the appropriate emergency response, protect the site using the facility's emergency procedure, and do not attempt to reinsert organs.
How Often Should Wounds Be Assessed and Measured?
There is no single interval that applies to every wound, setting, and dressing.
A comprehensive skin and tissue assessment should occur:
- As soon as possible after admission or transfer
- As part of pressure-injury risk assessment
- At intervals based on risk and clinical status
- When the patient's condition worsens
- At transitions of care
- Before discharge, when applicable
An existing wound should be visually assessed whenever it is appropriately exposed for care and whenever deterioration is suspected. However, a dressing designed to remain undisturbed should not automatically be removed simply to satisfy a generic schedule.
Formal measurements may be required:
- At initial identification
- At an ordered or policy-defined interval, often weekly for chronic wounds
- After debridement or another meaningful change
- When deterioration or healing progress must be quantified
- At transition of care
Follow the wound-care order, dressing instructions, facility policy, and specialty recommendations. Document why a wound could not be fully visualized—for example, a non-removable postoperative dressing or device.
Frequently Asked Questions
Can a Stage 4 pressure injury be down-staged to Stage 3 or Stage 2 as it heals?
No. Pressure injuries are not reverse staged during healing.
A Stage 4 injury remains documented as a healing Stage 4 pressure injury because the deepest original tissue damage does not disappear from the history when the wound fills with granulation tissue.
Document the current size, tissue, exudate, edges, periwound, and healing status rather than assigning a lower stage.
What is the difference between tunneling and undermining?
Undermining is a broad, shelf-like area of tissue loss beneath an intact wound edge. Tunneling is a narrower channel extending from the wound bed into surrounding tissue.
Use clock positions and centimeters to document both.
How often should a wound assessment be documented?
Follow the wound order and facility policy.
Document the wound when it is first identified, at required reassessment intervals, during applicable dressing changes, when the patient transfers, and whenever findings change. Formal measurements may be less frequent than visual assessment when a specialized dressing is intended to remain undisturbed.
Is purulent drainage always proof of infection?
Purulent drainage is a significant warning sign, but infection is assessed from the entire clinical picture.
Evaluate pain, warmth, color change, induration, wound breakdown, healing trajectory, odor after cleansing, systemic findings, and relevant diagnostic results. Escalate concerning findings promptly.
Is serosanguineous drainage normal?
A small amount of thin pink drainage can be expected in many healing wounds and early after surgery.
New, increasing, persistent, leaking, or heavy drainage—or drainage accompanied by worsening pain, separation, or systemic change—requires evaluation.
Can a Stage 2 pressure injury have slough?
No. The NPIAP definition states that granulation tissue, slough, and eschar are not present in Stage 2.
If any of these are visible, reassess the wound classification and etiology.
What is the difference between slough and pus?
Slough is devitalized tissue attached to the wound bed. Pus is purulent exudate that drains from the wound.
Both may look yellow or tan, so assess consistency, attachment, drainage, odor, surrounding tissue, pain, and systemic findings.
Should stable black eschar on a heel be removed?
Stable eschar on a heel or ischemic limb should not be softened or removed under NPIAP guidance.
Stable means dry, adherent, intact, and without erythema or fluctuance. The site still requires offloading, surveillance, perfusion assessment when indicated, and prompt escalation if it becomes unstable.
Can a pressure injury be staged from a photograph?
A photograph can support trend documentation, but it may not show blanching, temperature, tissue consistency, pain, depth, undermining, tunneling, or direct palpability of deeper structures.
Stage using a complete clinical assessment by a qualified clinician and follow organizational photography policy.
What does epibole mean?
Epibole means the wound edges are rolled under or thickened instead of migrating across the wound bed.
It can interfere with epithelial closure and should be measured or mapped by clock position when possible.
Do I measure the longest dimension or always use 12:00 to 6:00?
Use the method required by the documentation system.
Some systems use head-to-toe length from 12:00 to 6:00. Others use the longest wound dimension with width measured perpendicular to it. State the method and use it consistently.
What should I document if the dressing is not due to be removed?
Do not disrupt an ordered dressing solely to complete fields unless policy or clinical concern requires removal.
Document that the dressing remained in place, its type when known, whether it was clean, dry, intact, loose, leaking, or saturated, the visible periwound findings, pain, and the scheduled next assessment. Escalate any concern.
When should a wound-care specialist be consulted?
Consultation is appropriate when:
- Etiology or stage is uncertain
- A Stage 3, Stage 4, unstageable, or DTPI is identified
- Tunneling, undermining, necrosis, or exposed structures are present
- The wound deteriorates or does not progress as expected
- Infection, ischemia, or atypical pathology is suspected
- The treatment plan is ineffective or outside the bedside nurse's competency
Follow local referral criteria and escalate urgent findings immediately.
The Standard Is Reproducibility
An effective wound note does not need dramatic language.
It needs accurate, repeatable observations.
Use the correct staging system only when the injury is pressure related. Measure with the same method. Separate wound-bed tissue from drainage. Describe the edges and surrounding skin. Record pain and treatment response. Escalate changes instead of waiting for the next scheduled dressing change.
These habits help the team see the wound's trajectory—and act before a subtle change becomes a major complication.
References
- National Pressure Injury Advisory Panel. Pressure Injuries: Just the Facts—Staging and Education Sheet. 2025.
- National Pressure Injury Advisory Panel, European Pressure Ulcer Advisory Panel, and Pan Pacific Pressure Injury Alliance. Skin and Tissue Assessment. Prevention and Treatment of Pressure Ulcers/Injuries: Clinical Practice Guideline. Fourth edition. 2026.
- Agency for Healthcare Research and Quality. On-Time Pressure Ulcer Assessment. Content reviewed 2017.
- The Joint Commission. Quick Safety 25: Preventing Pressure Injuries. Updated 2022.
- Centers for Medicare & Medicaid Services. MDS 3.0 Resident Assessment Instrument Manual. Current manual page, updated 2026.
- Wound, Ostomy, and Continence Nurses Society. SRE 21: Patient Harm Associated With a Stage 3, Stage 4, Unstageable, or Deep Tissue Pressure Injury Acquired After Admission. 2026.
- International Wound Infection Institute. Wound Infection in Clinical Practice: Principles of Best Practice. 2022 update.
- Centers for Disease Control and Prevention. Surgical Site Infection Basics. 2024.
Related NurseZee Guides
- Pain Assessment in Nursing: PQRST, Scales, and Documentation Examples
- Nursing Progress Notes: Examples and Documentation Tips
- Common New Nurse Mistakes and How to Avoid Them
- Nursing Handoff Report: Guide and Examples
This article is for nursing education and general information. It does not replace patient-specific orders, organizational policies, manufacturer instructions, specialty wound consultation, diagnosis, or treatment by qualified clinicians. Follow your nurse practice act, scope of practice, infection-prevention requirements, and chain of command.